
alexcpn/code-review-agent
Agentic AI Code Review in Pure Python - No Agentic Framework
Agentic code review pipeline that plans, calls tools, and produces structured findings without any heavyweight framework. Implemented in plain Python using uv, FastAPI, and a small footprint wrapper library nmagents. Deep code context comes from a Tree-Sitter-backed Model Context Protocol (MCP) server.
What this repo demonstrates
- End-to-end AI review loop in a few hundred lines of Python (
code_review_agent.py) - Tool-augmented LLM via Tree-Sitter AST introspection from an MCP server
- Deterministic step planning/execution with JSON repair and YAML logs
- Works with OpenAI or any OpenAI-compatible endpoint (ollam,vllm)
- Ships as a FastAPI service, CLI helper, and Docker image
Demo https://alexcpn-code-review-agent.hf.space/
Using Tools https://alexcpn-treesitter-mcp.hf.space/mcp/
How it works
- Fetch the PR diff, ask the LLM for a per-file review plan, then execute each step.
- MCP server (codereview_mcp_server) exposes AST tools (definitions, call-sites, docstrings) using Tree-Sitter.
- Minimal orchestration comes from nmagents Command pattern: plan → optional tool calls → critique/patch suggestions → YAML logs.
Models are effective with very detailed prompts instead of one-liners. Illustration prompt is prompts/code_review_prompts.txt with context populated at place holders.
Results are good if a task can be broken into steps and each step executed in place. This keeps the context tight.
Models which gives good result are GPT 4.1 Nano, GPT 5 Nano.
Also this will run with any OpenAI API comptatible model; Like ollam (with Microsoft phi3.5 model) and vllm (with Google gemma model) wtih a laptop GPU.
Note that these small models are really not that good with complex tasks like this.
Core flow (excerpt from review_orchestrator.py)
file_diffs = git_utils.get_pr_diff_url(repo_url, pr_number)
response = call_llm_command.execute(context)                # plan steps
response_data, _ = parse_json_response_with_repair(...)     # repair/parse plan

tools = step.get("tools", [])
if tools:
    tool_outputs = await execute_step_tools(step, ast_tool_call_command)

step_context = load_prompt(diff_or_code_block=diff, tool_outputs=step.get("tool_results", ""))
step_response = call_llm_command.execute(step_context)      # execute each step
Prerequisites
- Python 3.10+
- uv installed
.envwithOPENAI_API_KEY=...- Running MCP server with AST tools (e.g., codereview_mcp_server) reachable at
CODE_AST_MCP_SERVER_URL
Setup
Start the Code Review MCP server
git clone https://github.com/alexcpn/codereview_mcp_server.git
cd codereview_mcp_server
uv run python http_server.py  # serves MCP at http://127.0.0.1:7860/mcp/
Running Locally with Ray (Pure Ray)
This is the simplest way to run the agent without Kubernetes complexity.
Start Ray
Start a local Ray cluster instance:
uv run ray start --head
# if there is problem with start up, kill old process
ray stop --force
Note: This starts Ray on your local machine. You can view the dashboard at http://127.0.0.1:8265
Run Redis with persistent storage:
docker run -d \
  -p 6380:6379 \
  --name redis-review \
  -v $(pwd)/redis-data:/data \
  redis \
  redis-server --appendonly yes
To delete older jobs
redis-cli --scan --pattern "review:*" | xargs redis-cli delRun the Agentic AI Webserver
Note - see the .env (copy) file and create a .env file with the same variables but correct values
OPENAI_API_KEY=xxx
REDIS_PORT=6380
AST_MCP_SERVER_URL=http://127.0.0.1:7860/mcp/
RAY_ADDRESS="auto"
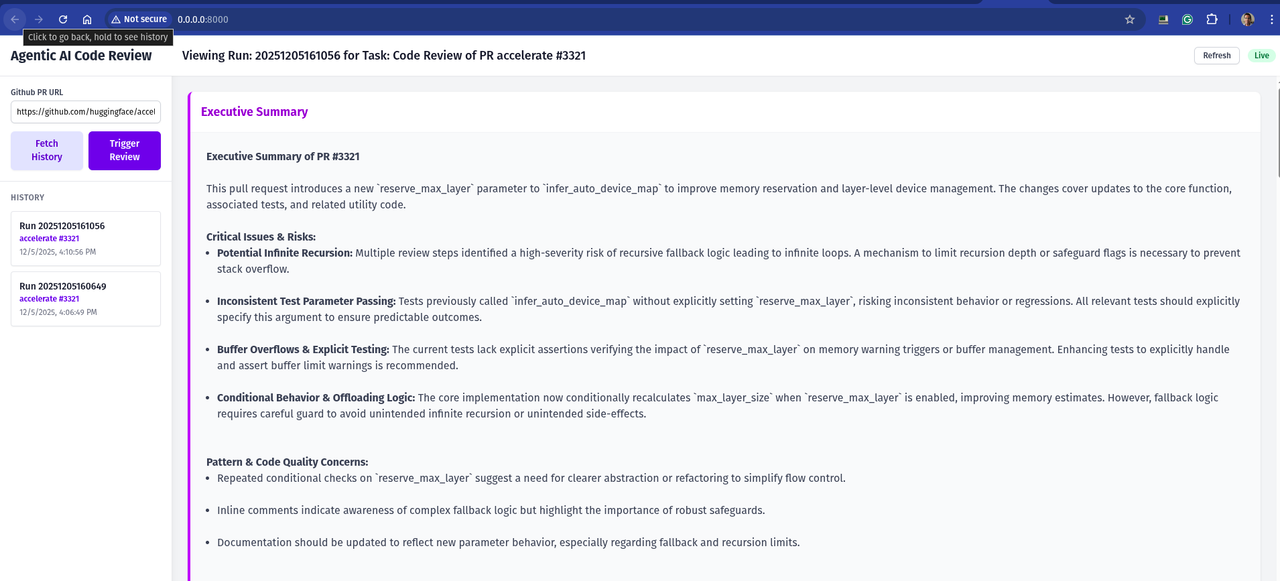
uv run web_server.py This will start the web server on http://0.0.0.0:8000/
You will get a UI to trigger the review and see triggered reviews and steps
Deploying to Hugging Face Spaces
This repository includes a configuration to deploy directly to Hugging Face Spaces (Docker SDK).
- Create a New Space:
- Go to Hugging Face Spaces.
- Create a new Space.
- Select Docker as the SDK.
- Upload Files:
- Upload the contents of this repository to your Space.
- Important: You must tell Hugging Face to use
Dockerfile.hfinstead of the defaultDockerfile. - You can do this by renaming
Dockerfile.hftoDockerfilein the Space, or by configuring the Space settings if supported. - Recommendation: Rename
DockerfiletoDockerfile.localandDockerfile.hftoDockerfilebefore pushing to the Space.
- Set Secrets:
- In your Space settings, go to Settings > Variables and secrets.
- Add a new secret:
OPENAI_API_KEYwith your API key.
- Run:
- The Space will build and start.
- Once running, you will see the web interface.